Saturday, March 3, 2012

Savory Saturday: Kiwi Salsa

Is it really still winter? I'm definitely not used to this.  In Phoenix, the beginning of March is filled with beautiful 80 degree days... perfection.  In Portland? Rain. Cold. Repeat.  Since the weather isn't cooperating with my need for spring, I made a quick little salsa that did the trick.  Pair this baby with a margarita, some chips and guac and you'll think you're on a mini-vacation.

To bulk it up even more, I topped grilled salmon tacos with the Kiwi Salsa.  Good choice. Definitely take the time to fry up some corn tortillas - the crunch is a great contrast to the fish, fruit and guacamole.


Kiwi Salsa
Recipe adapted slightly from Jessica at How Sweet Eats 

ingredients
4 kiwi, peeled and diced
2 tablespoons finely chopped red onion
1 jalapeno, very finely minced (use 1/2 if you like it mild!)
2 tablespoons chopped fresh cilantro
pinch of salt
pinch of pepper
generous squeeze of fresh lime juice

Combine all ingredients and stir gently.  Refrigerate until ready to use.  
Eat over tacos, with chips, or just by the spoonful!


Thursday, March 1, 2012

Thursday Things: Happy March!

Looks like I missed a couple of days of blogging, huh?  I promise I have a good excuse! I took the little boys back home to Phoenix for a long weekend trip to see their grandparents.  We had a fabulous time, and it really made me long to move our little family back there.  As happy as we have been in Portland/Vancouver... it just isn't the same as home, you know?  

This week, I have a bunch of wonderful things to share with you, starting with a super-duper cute music video by my favoritest singer in whole world.  Yes, I'm aware that favoritest isn't a word. But it should be, so I'm using it.  Not only is the song absolutely precious, but the video is so. stinkin'. sweet.  And, you know what?  JJ and her husband, Dave filmed this - in their own living room - in 3 days.  That is some seriously talent.  If you have never heard of JJ Heller's music, please take a second to check out her gorgeous songs via spotify, itunes, or youtube.  I hope you love this as much as I do!


Do you have a baby? I do! And he loves to eat. all. the time.  I know that feeding a baby isn't exactly rocket science, but any little gadget that makes mealtime easier is worth a try.  I'm usually on my own with the two boys at dinnertime, and trying to use both hands to feed Charlie makes it nearly impossible to feed myself. And feeding myself is darn important. This handy-dandy little spoon contraption is awesome and lets me do a one-handed feeding. Yippee! I get to eat my own dinner before it is totally lukewarm. Win-win!

And these? Even stay-at-home moms need cute shoes, right?  Even if they run the risk of getting covered in spit-up and baby food...


Source: fabsugar.com via Laura on Pinterest

Tuesday, February 21, 2012

Tuesday Treats: Flourless Fudge Chocolate Chip Cookies

Mmmm... cookies.  Oreos, snickerdoodles, chocolate chip, macaroons.  There really isn't a cookie I've met that I haven't wanted to cozy up to.  This little gluten-free number is no exception.  Be warned: it is super rich and fabulously decadent, though it still has a light crunch from the egg whites.  Get yourself a big glass of milk to wash these babies down!


Flourless Fudge Chocolate Chip Cookies
recipe from The Recipe Girl
Yield: about 2 dozen cookies

ingredients
3 cups powdered sugar
2/3 cup unsweetened Dutch-process cocoa powder
1/2 tsp salt
2 to 4 egg whites, at room temperature
1 Tbsp vanilla extract
1 1/2 cups semi-sweet chocolate chips

Preheat the oven to 350.  Line two baking sheets with lightly greased parchment paper (or use silpats). 

In a large bowl, mix dry ingredients until well combined.  Whisk in 2 egg whites and vanilla extract.  Mix (I use a hand mixer) until just blended.  You want the batter to be brownie-like: a thick and fudgy consistency.  If it is too thick, add more egg whites, one at a time.  Do not overmix.

Spoon batter onto prepared baking sheets.  Bake approximately 14 minutes, until tops are glossy and beginning to crack.  Slide silpat/parchment paper onto wire racks.  Let cookies cool completely before removing from parchment paper.  The cookies will keep for about 3 days in an airtight container (if you don't eat them first!


Friday, February 17, 2012

Savory Saturday: Caribbean Black Beans and Rice

My husband is a pretty simple guy - give him some rice and beans for dinner, and he is a happy man.  Give him this amped-up version and he ends up cleaning the kitchen afterwards because he's so thankful (and let me tell you, that doesn't happen often!).  This recipe is super simple, fast, and easy to double.  I often make an extra portion so we have leftovers for another night of the week because we usually don't have a single bite left after the Mr. gets done with this meal!

Most of the ingredients are pantry staples in my house, which makes this a great weeknight meal.  If you don't happen to have fresh cilantro on hand, send someone to the store - it really makes this dish sing!  You'll thank me later, after you've had a bite and it starts singing an awesome Caribbean tune to you.  I love this meal served with a side of gooey quesadillas or a handful of tortilla chips, and leftovers make a delicious burrito filling.  So many possibilities!

Caribbean Black Beans and Rice
adapted from The Eating Well Rush Hour Cookbook

ingredients
2 cups chicken or vegetable stock
1 cup rice (I use brown basmati, but use whatever you have on hand)
1 Tbsp olive oil
1 12oz jar roasted red peppers, drained and cut into thin strips
1 bell pepper (whatever color you like!), cut into short thin strips
1/2 to1 jalapeno, seeds and ribs removed, finely diced
2 cloves garlic, finely chopped
2 cans black beans, rinsed and drained
2 Tbsp white vinegar
1/2 tsp sea salt
Freshly ground black pepper, to taste
10 or so dashes Tabasco sauce
large handful of chopped cilantro


Combine stock and rice in a medium saucepan and bring to a boil.  Cover and reduce heat to low.  Simmer until rice is tender and stock has been absorbed.  (Time will depend on the rice you are using. My brown basmati rice takes about 25-30 minutes).

Meanwhile, in a large skillet, heat oil over medium-high heat.  Add all peppers and garlic and saute for 3-4 minutes.  Add beans, vinegar and Tabasco sauce.  Saute for 1-2 minutes, then reduce heat to low. Simmer for 5 minutes.

Stir in rice (or serve over rice) and add cilantro.  Serve and enjoy!


Thursday, February 16, 2012

Thursday Things

Oooo! My very first "Thursday Things" post!  I follow a handful of bloggers who have a similar weekly post, and I always look forward to reading them.  They are always full of fun ideas, things that I want to (and shouldn't) buy, and inspiration for projects.  

Things that I'm loving this week:


Being that this is the week of all things pink, red, and covered in hearts - I had to put this on my list! I mean, seriously! How darn adorable is that? Cupcakes are great.  Cupcakes in a jar?  Ah-MAY-zing!  Will you make me one? Please?


Oh my heavens, this stuff is fabulous. I knew at first glance that I had to make it, and yesterday I finally did. My hands have never been smoother! It is super easy to throw together (I'll be posting a how-to in the next week or please click the link to the original "recipe") and smells delicious. A perfect hostess gift... or you can indulge yourself and keep it for YOU!


Pink. Pretty. Mint. Raspberries. What more could you ask for? What? A shot of rum? Well... okay! But only because you insisted.

What are you loving this week?

Tuesday, February 14, 2012

Tuesday Treats: Valentine's Day Edition


Snap, crackle, pop. Oh, yeah... a little throwback to your childhood (or mine. If you didn't have a cool mom who made you rice crispy treats, then I'm sorry).  Now, let's be honest - all the best desserts have gluten. Sad for my little family.  I'm a big fan of flour-laden cupcakes and cookies, but for the other two eaters in my house, I cook gluten-free.  Enter Valentine's Day: what in the world do you do when your kid goes to school and they have a dietary restriction?? Answer: you back lots of rice crispy treats.  You bake enough so the whole class gets them and your kid doesn't feel sad that he missed out on cupcakes... again.  Little side note: most rice crisp cereals DO have gluten (in the form of barley malt), so be a good label reader if you have food sensitivities.  I found a GF-version of Kellog's Rice Crispies at Fred Meyers (Fry's) and Whole Foods has a different GF brand, as well.  All you have to do to make them holiday-party ready is to toss a handful of m&ms on top before you smoosh the marshmallow/cereal mixture totally flat in the pan... throw a bunch of sprinkles on top, and the kids will love it!

Rice Crispy Treats

ingredients
1/4 cup butter
6 cups marshmallows
8 1/2 cup rice crispy cereal
optional: m&ms and sprinkles

Melt butter in a large stock pot or dutch oven over medium heat.  When butter is completely melted, add marshmallows and stir constantly until mixture is totally smooth.  Add cereal and stir, stir, stir until it is mixed evenly.  Pour mixture into a lightly oiled 9x13" pan.  If adding m&ms, scatter them on top of mixture, then press mixture firmly into the pan, creating a smooth top.  
Helpful hint: use a piece of parchment paper to help you smoosh the mixture down so it doesn't stick to your hands.

*

Ohhh! Guess what?! You get TWO awesome (and super easy) recipes this week.  I obviously {heart} you.  Carter and I made these easy little treats for his lovely teacher.  Hopefully she's not weirded out by homemade treats like I was when I was teaching... 


Valentine's Day Pretzel Candy Bites

ingredients
small pretzels (squares or traditional shape)
1 package of Hershey's Hugs (or kisses!)
1 package of m&ms - fun holiday colors preferred!

Preheat oven to 200.  Lay pretzels on a silpat or parchment paper lined cookie sheet (I made about 35 on one cookie sheet).  Place unwrapped Hug in the middle of each pretzel.  Pop into the oven for 3-4 minutes.  SET YOUR TIMER!  Seriously.  If you leave them even a minute too long, you'll have a pool of chocolate and it won't be so pretty.

Remove from the oven as soon as chocolate is soft enough to squish down when you press the m&m onto the top.  Once all m&ms are squished into their little chocolate nests, put the cookie sheet into the refrigerator until candies have completely cooled.  Remove cooled candies from cookie sheet and keep in an airtight container or eat right away!


Saturday, February 11, 2012

Savory Saturday: Potato and Black Bean Enchiladas

If you've been reading this blog for very long, you must think I'm a vegetarian.  I'm actually not.  Seriously, I have proof: my twitter name is @lauralovesBACON - but my husband is a wanna-be veg-head.  Due to his job (he has the arduous task of constantly taking people out to eat... he might do more than just that, but who knows what!), he has to eat meat occasionally, so when he's at home, he prefers to eat meat-free.  This was a HUGE transition for me.  I love me some burgers and fried chicken and bacon.  Preferably all on the same plate with a side of sausage.  So, when this whole vegetarian thing started, I was sort of at a loss for meals.  Thankfully, the internet is my friend, and I now have more veggie-focused meals than I could have imagined.  This particular entree is a definite favorite of mine.  I love enchiladas in any form, and the potato/black bean mixture makes them hearty and filling, but not heavy or greasy like enchiladas often are.  Even if you usually eat a hunk o' meat at every meal, you'll still love these... promise.


Potato and Black Bean Enchiladas

originally adapted and posted by me on allrecipes.com 

Ingredients
1 pound Yukon Gold potatoes, diced small
1 1/2 teaspoon cumin
1 1/2 teaspoon chili powder
1 teaspoon salt
1 tablespoon ketchup
1 jar chili-verde salsa
1 tsp. olive oil
1 large onion, diced
1 bell pepper, diced
1 cup frozen corn
1 (15.5 ounce) can pinto beans, rinsed and drained
1 (15.5 ounce) can black beans, rinsed and drained
1 bunch fresh cilantro, coarsely chopped
1 (12 ounce) package Mexican cheese blend (cheddar or pepperjack are also great)
2 (12 ounce) packages corn tortillas

Preheat oven to 400.  Toss diced potatoes together with cumin, chili powder, salt, and ketchup in a bowl.  Mix until potatoes are evenly coated with spices, then place on a lightly oiled baking dish.  Bake in preheated oven for 20-25 minutes or until tender.


Meanwhile, heat saute pan over medium-high heat.  Add olive oil and saute bell peppers and onion until they begin to soften.  Add corn and continue sauteing for 2-3 minutes.  Remove from heat, then add beans and potatoes.  Stir well to combine.


To assemble: Spread a thin layer of salsa on the bottom of a 9x13 or two 8x8 baking dishes. Layer with corn tortillas, slightly overlapping.  Top tortillas with 1/2 of the bean and potato mixture.  Sprinkle liberally with cilantro and 1/3 of the cheese.


Add another later of tortillas, salsa, bean mixture, cilantro, and cheese.  Finish with one more layer or tortillas, salsa and cover with remaining cheese.


Bake for 20 minutes, until hot and cheese is bubbling.  Sprinkle with remaining cilantro just before serving.  Guacamole or sour cream on the side would be an excellent idea! 

Friday, February 10, 2012

Goals: Keeping Up.

I love having a blog.  It gives me a creative outlet, encourages me to try new recipes, and gives me an awesome subject to practice photographing (food!!).  Considering I have a 6-month old baby and a 5-year old crazy child, I think I've done a relatively good job at posting semi-regularly... but I would love for this to become more routine.  I'm a creature of habit, and if I'm not used to doing something regularly, it generally gets forgotten about eventually.  Since people (what people? I dunno...) always say that you are more likely to stick to a goal if you write it down - here goes.  A little challenge for myself, because if I actually tell you my plan, I might hear your little voice whispering in my head, Go blog! You said you would!  


So here's the general plan:

  • I'm starting out with a simple 3 day/week goal.
  • Tuesday Treats - blogging about some kind of sweet and tasty treat that I've made and need to share with you.
  • Thursday Things - posting about my favorite finds of the week... things that have been inspiring me on other people's blogs and pinterest.
  • Savory Saturday - recipes and photos for something, um... savory. Did you not read the title? Y'know, like appetizers, main dishes, or lunch box yums.

I can totally do this.

So, come Saturday, I expect you all to pop back over here to check up on me.  I have a deeeelicious recipe for black bean and potato enchiladas coming your way!

Sunday, January 15, 2012

Valentine's Day Pretzels

Two big news items:

1. I actually completed one of the many thousands of things I've pinned on Pinterest.

2. Carter helped me.


Now, #2 is seriously huge.  Carter doesn't like to do anything with me, unless it involves an iphone or playstation.  He is so not into cooking or crafting which leaves me debating whether or not he was switched at birth. Just sayin'.

But, he seemed super excited to help make these cute little treats.  Yes, I know I'm WAY early on the Vday desserts... but I wanted to eat them, and didn't want to wait another month.  So there.

His favorite part was dropping the sprinkles.  And I've been sweeping them up for days now.


It was some good fun, even if I did have to bite my tongue about 30-million times to stop myself from telling him the "right" way to dip the pretzels. Control-freak, much?

Even with his less-than-perfect confectionary skills, they still turned out super cute and deliciously edible!


Oh... were you looking for a recipe? Here you go: melt some white chocolate chips. Dip pretzels in them. Lay pretzels on parchment paper/silpat-lined cookie sheet.  Sprinkle with sprinkles! Refrigerate until chocolate hardens again. The end.

Wednesday, December 14, 2011

Sweet Potato Risotto

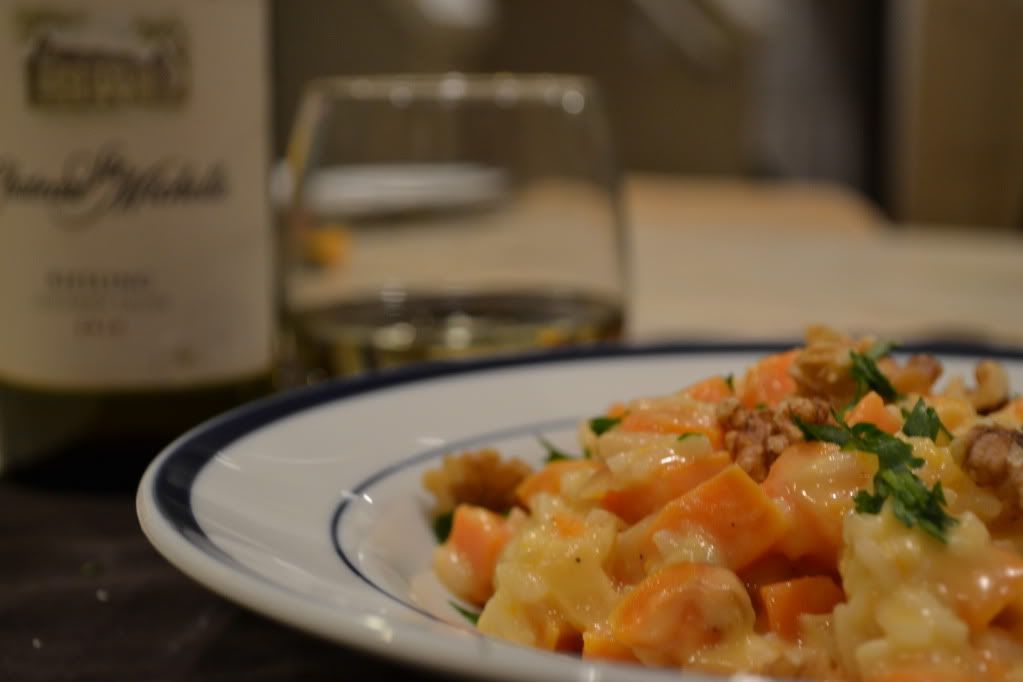
My family loves sweet potatoes.  We stick 'em in enchiladas, make them into French fries, and even enjoy them in little tarts.  So, of course, I had to make this recipe when I saw it on Pinterest.  The recipe was originally posted by Ezra Pound Cake, which has a totally awesome blog.  You should definitely check it out (um, after you finish reading mine. duh.).  It is a perfect recipe for cold weather, and I think it would be extra fantastic with a pinch of sage and thyme thrown in for some Thanksgiving-style flavor.  Mmm... next time! Word of advice: don't skip the garnish. The parsley and toasted walnuts were an amazing addition, adding the perfect crunch and flavor to this dish.


I know what you're thinking... Risotto?  I know that you don't have time to be slaving over a hot stove, stirring endlessly while your dinner comes together.  This is a much quicker, yet still super delicious, method... and I know you'll like it. 


Sweet Potato Risotto
Yield: 4 servings

Ingredients
2 Tbsp butter
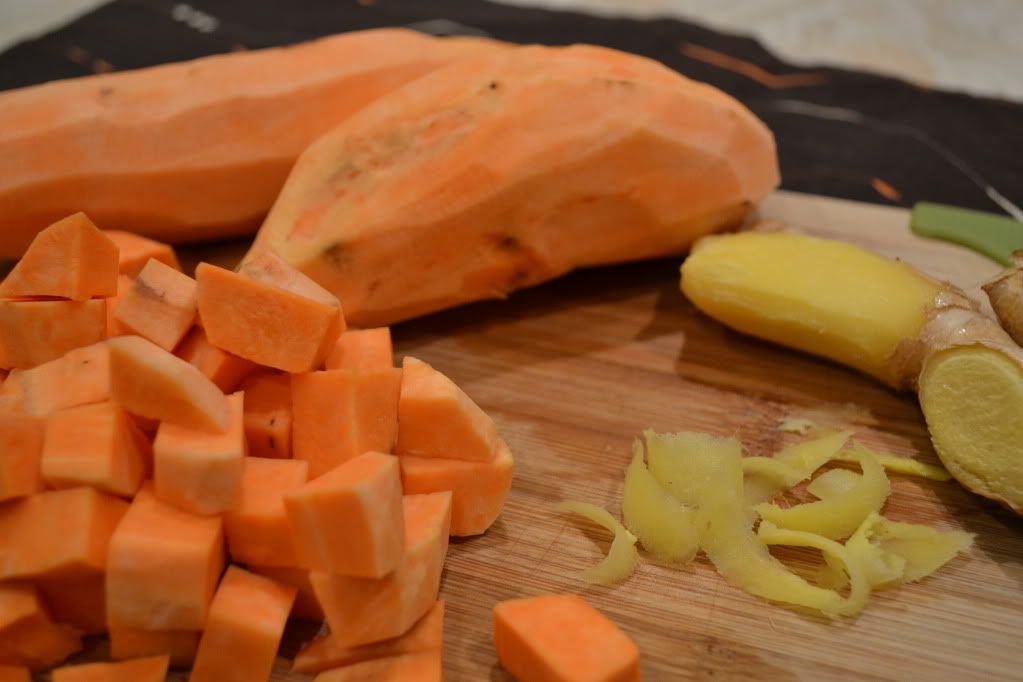
1lb sweet potatoes, peeled and cut into 1/2" pieces
1 onion, finely chopped
1/4 tsp minced, peeled fresh ginger
2/3 cup arborio rice
1/4 cup riesling wine (save the rest for drinking!)
2/3 cup mascarpone cheese
1/4 cup toasted walnuts, roughly chopped
1/4 cup chopped flat-leaf parsley


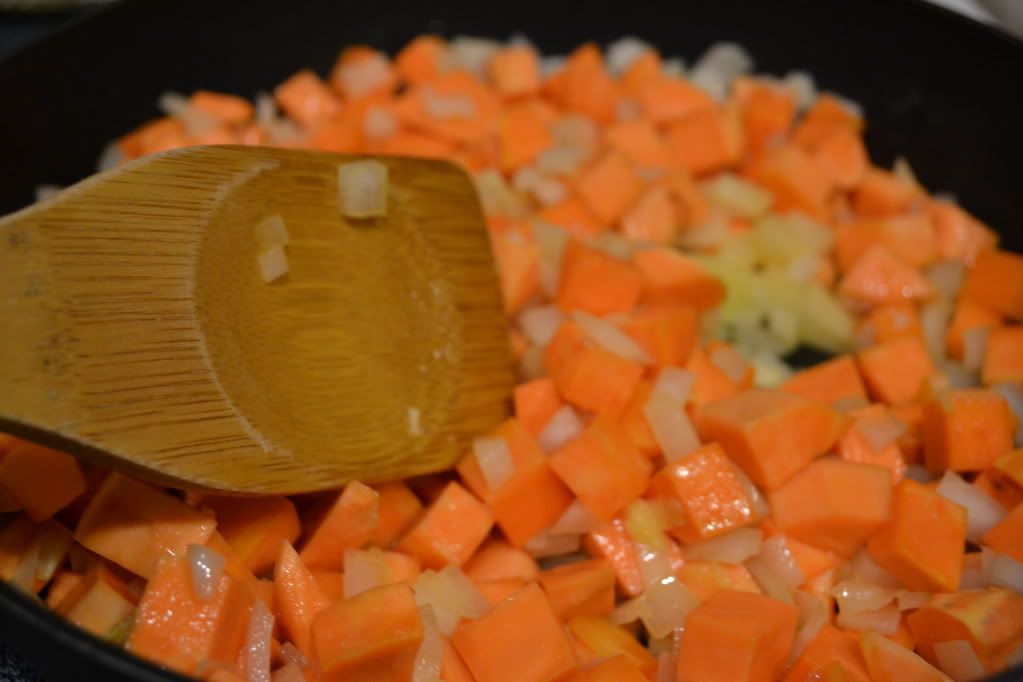
Melt butter in a large skillet over medium-high heat.  Add sweet potatoes, onion and ginger; saute approximately 15 minutes, until sweet potatoes are tender.
Remove from heat.


Cook rice in a small sauce pan of salted water or vegetable stock until just tender, but still firm to the bite, stirring frequently for about 15 minutes.
Drain rice.


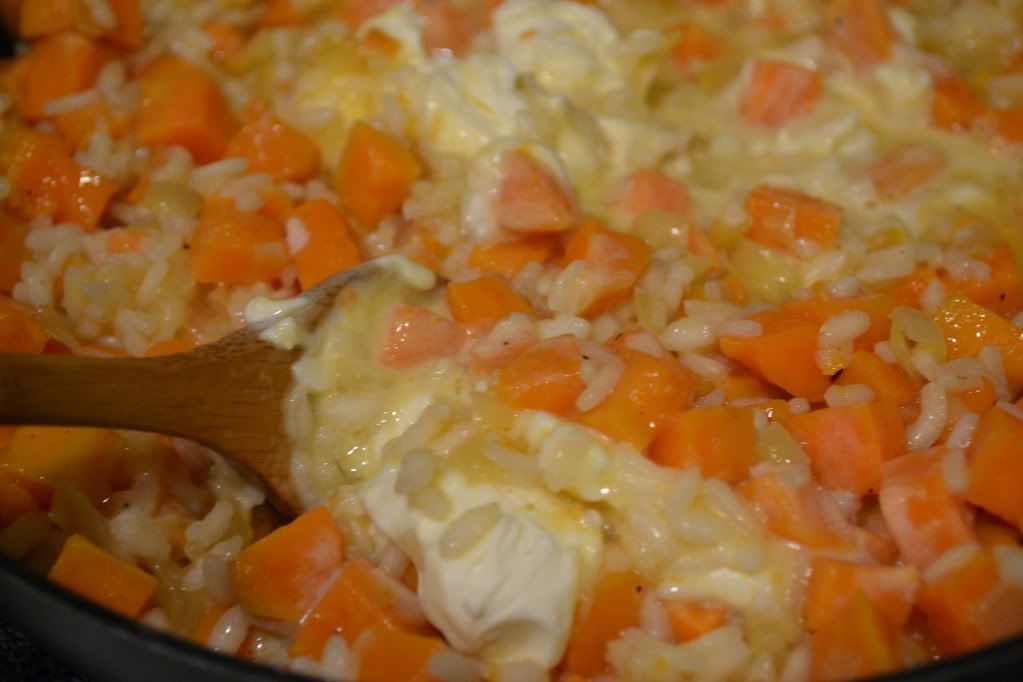
Add rice to sweet potato mixture. Add riesling and stir over medium-low heat until blended. Stir in mascarpone until melted. Season with salt and pepper.


Spoon risotto into bowls and top with parsley and toasted walnuts.


Enjoy!


Sunday, December 4, 2011

Thai Green Curry Soup

As much as it pains me to step.away.from.the.pumpkin... it must be done.  Otherwise, I'll probably turn all orange and mushy.  It just isn't good.

This week, I have some yummy and savory deliciousness to share with you.  

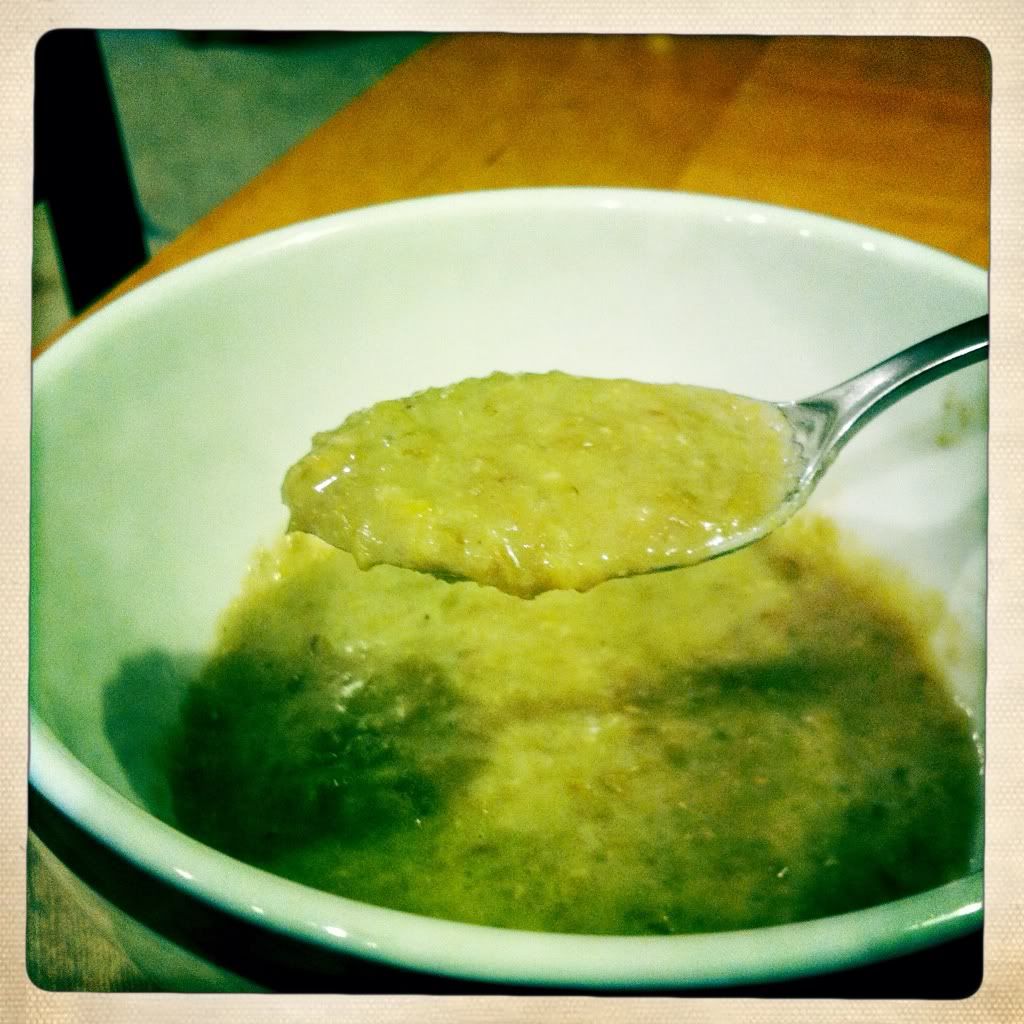
Don't mind the fact that this is probably the ugliest recipe you have ever seen.  anywhere.  EVER.

Seriously, it is an ugly-duckling of a recipe, but it tastes SO GOOD.  Warm and comforting, a little kick to it, creamy and hearty and all kinds of wonderfulness for this cold weather we've been having.

Ignore its appearance.  Make it.  Eat it.  Love it.

told you it wasn't pretty... don't judge. 

Thai Green Curry Lentil Soup
recipe from Simple Bites
Yield: 6 bowls of goodness

Ingredients
2 Tbsp coconut oil (or butter)
1 Tbsp curry powder (I used the BEST green curry powder EVER)
2 tsp minced garlic
1 large onion, chopped
5 cups vegetable stock
1 1/2 cup green lentils, rinsed
1/2 cup canned coconut milk
1 tsp sea salt

Melt coconut oil in a large stockpot over medium heat.  Ad curry powder, garlic and onion. Saute for 3-4 minutes, stirring frequently.

Add vegetable stock and green lentils. Bring soup to a boil, then partially cover and reduce heat.  Simmer for 35-55 minutes, until lentils are tender (mine usually takes 50+ minutes).

When lentils are tender, remove soup from heat. Stir in coconut milk and salt. Puree to your desired consistency using an immersion blender or regular blender (in batches if using a regular blender).  I like my soup with a little bit of texture, but find out what works best for you!

Serve on its own or over rice with your choice of garnish: chopped chives, a little plain yogurt, a pinch of curry powder... a chocolate donut... get crazy!


Monday, November 14, 2011

Pumpkin Bars with Caramel Frosting

What did you just say?  Did you really just ask me to post another pumpkin recipe?  Don't you know how over pumpkin everyone is?  Huh?  People aren't over pumpkin yet?  Well, thank goodness, because I have a little dish full of deliciousness to share with you.  

These pumpkin bars are simple, sweet, warm with fall spices, and are the perfect nibble... every. single. time. you walk through the kitchen.  Nearly every pumpkin recipe out there seems to be slathered with cream cheese frosting.  Now, don't get me wrong - I love cream cheese frosting - but there is something unexpectedly fantastic about going with caramel.  

So, go on now... melt yourself some butter and get baking!

Pumpkin Bars with Caramel Frosting
recipe from A Pinch of Yum
Yield: 2-3 dozen, depending on how generously you slice them up

Bar Ingredients
2 cups brown sugar, packed
1 cup pumpkin puree 
4 eggs
1 cup flour
1/2 tsp baking soda
1 tsp baking powder
1 tsp cinnamon
1 tsp nutmeg
1 tsp ground ginger
1/2 cup melted butter

Frosting Ingredients
1/2 cup butter
1 cup brown sugar, packed
1/4 cup milk (I used half&half)
1 3/4 cup powdered sugar

Preheat oven to 350. Grease/spray a 10 1/2 by 16 inch pan (if you use a smaller pan, you might need to put foil over the top halfway through to prevent over-browning before the middle cooks properly). 

Mix together bar ingredients, adding melted butter last.  Pour into prepared pan. Bake until cake springs back when lightly touched, approximately 40 minutes. Cool completely.

For the frosting, boil butter and brown sugar for two minutes.  Add the milk, whisking until well-combined. Bring it to a boil again, then add powdered sugar.  Whisk until smooth and pour over cooled cake immediately.  Frosting will set very fast, so be sure to pour it evenly over the cake to avoid having to spread with a spatula.

A little sprinkle of sea salt over the top of the frosting is delicious, and gives a nice contrast to the sweet frosting. Mmmm!

Monday, November 7, 2011

Best Chili EVER.

Sometimes I look into my spice cabinet and get completely overwhelmed by the sheer quantity of tiny glass jars sitting there.  How did I get so many?  And how in the world am I ever going to use them all up?  That is when I pull out the big guns - awesome, spice-heavy chili.  A batch of this deliciousness will serve a couple purposes:

1. It'll make you look like a chili-contest-winning, super-duper-amazing cook
2. It'll help you work through your never-ending rows of spices... so you can... well, buy more.

This is some seriously tasty chili.  I discovered the original recipe a few years ago at allrecipes.com and made just a few minor tweaks (most notably, a big increase in bacon!).  It takes awhile to simmer, but the effort is so worth it.  Make sure you are using a BIG pot - this will feed a crowd! 

Best Chili EVER.
Yield: 16 bowls of goodness (freezes/reheats well)

Ingredients
2 pounds ground beef
1 pound bulk Italian sausage (or links with casing removed)
3 (15oz) cans of beans (I use a mix of black, kidney, and cannelini beans)
1 (15oz) can of chili/pinto beans in spicy sauce
2 (28oz) cans diced tomatoes with juice (fire-roasted, if you can find them!)
1 (6oz) can tomato paste
1 large yellow onion, finely chopped
2 stalks celery, finely chopped
2 red bell peppers, seeded and finely chopped
1 can roasted green chilies 
3-4 slices of cooked bacon, crumbled
1 Tbsp + 1 tsp Beef Better then Bouillon (can substitute bouillon cubes)
1/2 cup beer
1/4 cup chili powder
2 Tbsp Worcestershire sauce
1 Tbsp minced garlic
1 Tbsp dried oregano
2 tsp ground cumin
2 tsp hot pepper sauce (Tabasco)
1 tsp dried basil
1 tsp sea salt
1 tsp ground black pepper
1 tsp cayenne pepper
1 tsp paprika
1 tsp sugar

Garnish with:
Corn chips (Fritos) and shredded cheese

Heat a large stock pot over medium-high heat. Cook ground beef and sausage until evenly browned.  Drain off excess grease.

Pour in beans, tomatoes and tomato paste.

Add all remaining ingredients and stir to blend.

Simmer over low heat, stirring occasionally, for at least 2 hours.

After 2 hours, taste and adjust salt, pepper, and chili powder, if needed. 

Serve with fritos, shredded cheese, and cornbread!


Oh, yeah, and sorry for the lack of photos. Chili isn't really the most photogenic food out there, you know? 

Thursday, November 3, 2011

Oh, Nuts!

I have an addiction to spice blends.  I admit it.  

Phew.  I feel a lot better getting that off my chest! 

I have tons and tons of tiny tins, jars and bottles of the most amazing spice blends - Jamaican Jerk, Thai Green Curry, Park Hill Maple Pepper, Chili and Lime... you get the point.  As much as I love these delicious spices, they usually sit unused for quite a long time.  They are so taste-specific, that they usually only "belong" to one or two recipes in my repertoire.  After months years of collecting, I decided I needed a plan to use them up.  I mean, how else am I going to clear enough room in the spice cabinet to buy new spices?!

Today, while flipping through the latest Food Network magazine, inspiration struck!  Spiced nuts!  YES.   We always have a ridiculous amount of nuts in the house (and that is besides the people), so I had everything I needed on hand already. I used a spice blend called Park Hill Maple Pepper from the fabulous spice shop, Savory (you can order online if there isn't a location near you). It is a mixture of maple sugar, black pepper, coriander, tumeric, ginger, nutmeg, cumin, mustard and lots of other fantastic flavors. A perfect sweet and savory blend.

Unfortunately, batch #1 was a huge FAIL.  I used the temperature/time recommendations from the magazine and managed to horribly burn the batch.  Ugh.  Word of caution - do not stray far from the oven during cooking time.  If you start smelling the nuts getting toasty, remove them asap... there is no recovering burnt nuts.  Luckily, batch #2 was a delicious success.  I lowered the temperature and decreased the cooking time.  Perfection! 

Park Hill Maple Pepper Spiced Nuts
Yield: 2 cups

Ingredients
1 cup unsalted or reduced salt peanuts
3/4 cup cashews
1/4 cup pepitas (pumpkin seeds)
2 Tbsp vegetable oil
1 Tbsp Park Hill Maple Pepper spice blend (or whatever spice blend that you happen to have sitting around in your spice cabinet)
Sprinkle of salt and black pepper

Preheat oven to 400˚.  Line baking sheet with parchment paper or silpat.

Mix nuts with vegetable oil and spices in a small bowl.  Stir until nuts are evenly coated.

Spread in an even layer on baking sheet.  Bake for 4-6 minutes, stirring once.  Pay close attention - the second they start getting golden brown, get them OUT of the oven!

Transfer to cooling rack lined with parchment paper or paper towels to cool.  Enjoy!